How to Activate Your NSC-DB2 Video Doorbell (Guarding Vision)
In this guide, we will walk you through activating and setting up your NSC-DB2 video doorbell using the Guarding Vision mobile application. By the end of this short guide, your video doorbell will be fully activated and ready to go.
Verify that Your Doorbell is Ready For Activation
Before moving to your phone, check that your doorbell is properly installed. This guide assumes that your video doorbell is installed and wired to your chime and transformer. Make sure your LED status light is blinking blue before continuing. If your doorbell is not yet installed, click here to check out our installation guides. If your doorbell is already installed but the status light is solid blue or red, you'll need to reset your device. To reset your device, press down on the white reset button (above the doorbell button under the faceplate) until you hear the following vocal feedback:
Reset successfully.

The status light will turn red as the doorbell reboots. Do not proceed until the light flashes blue and the doorbell says:
Please use app for device Wi-Fi configuration."
Once your device is flashing blue, you may begin the setup process.
Download the Guarding Vision Application
The Guarding Vision mobile application is available for both Android and Apple devices. You'll need this application to activate your video doorbell.


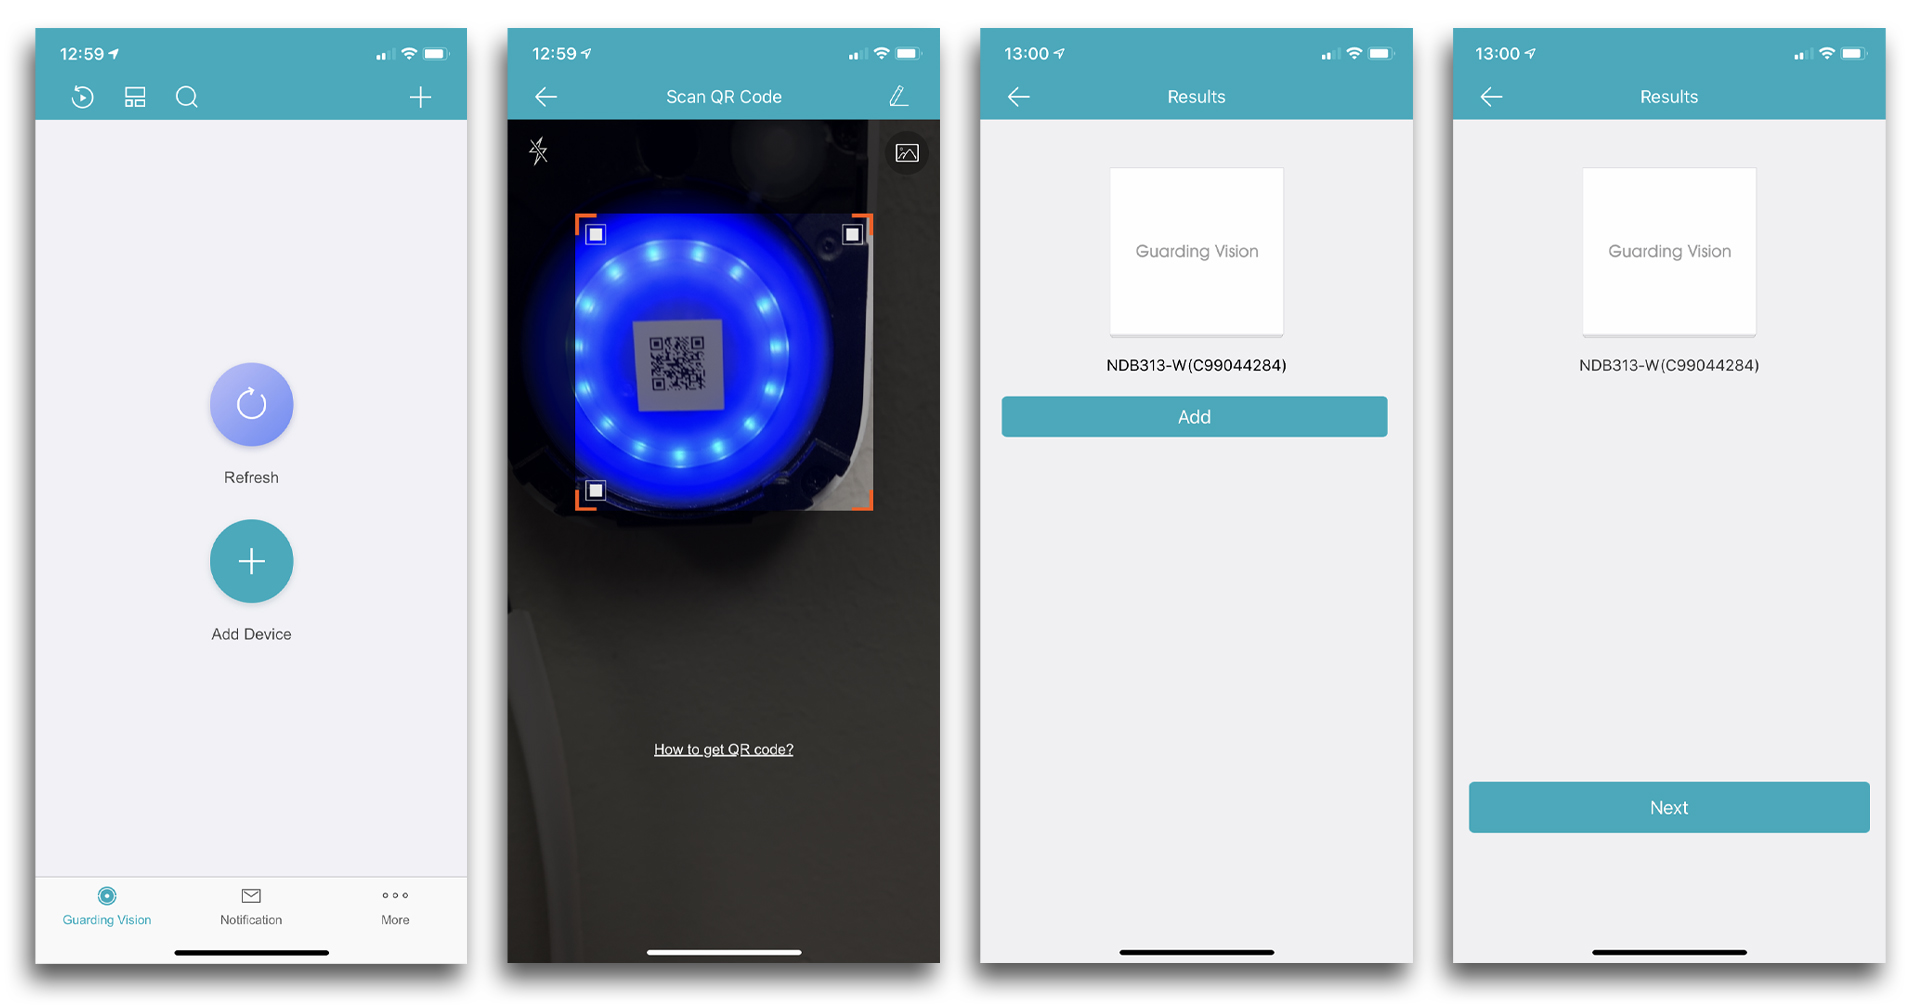
Add Your Doorbell to Your Device List
Once you've downloaded Guarding Vision, launch the app and either create a cloud account or sign into an existing account. Tap the blue plus (+) icon to add a new device. This will bring up your phone's camera, which you'll use to scan the QR code on the doorbell. The QR code is located on the doorbell button underneath the faceplate. Click "Add" and then "Next."
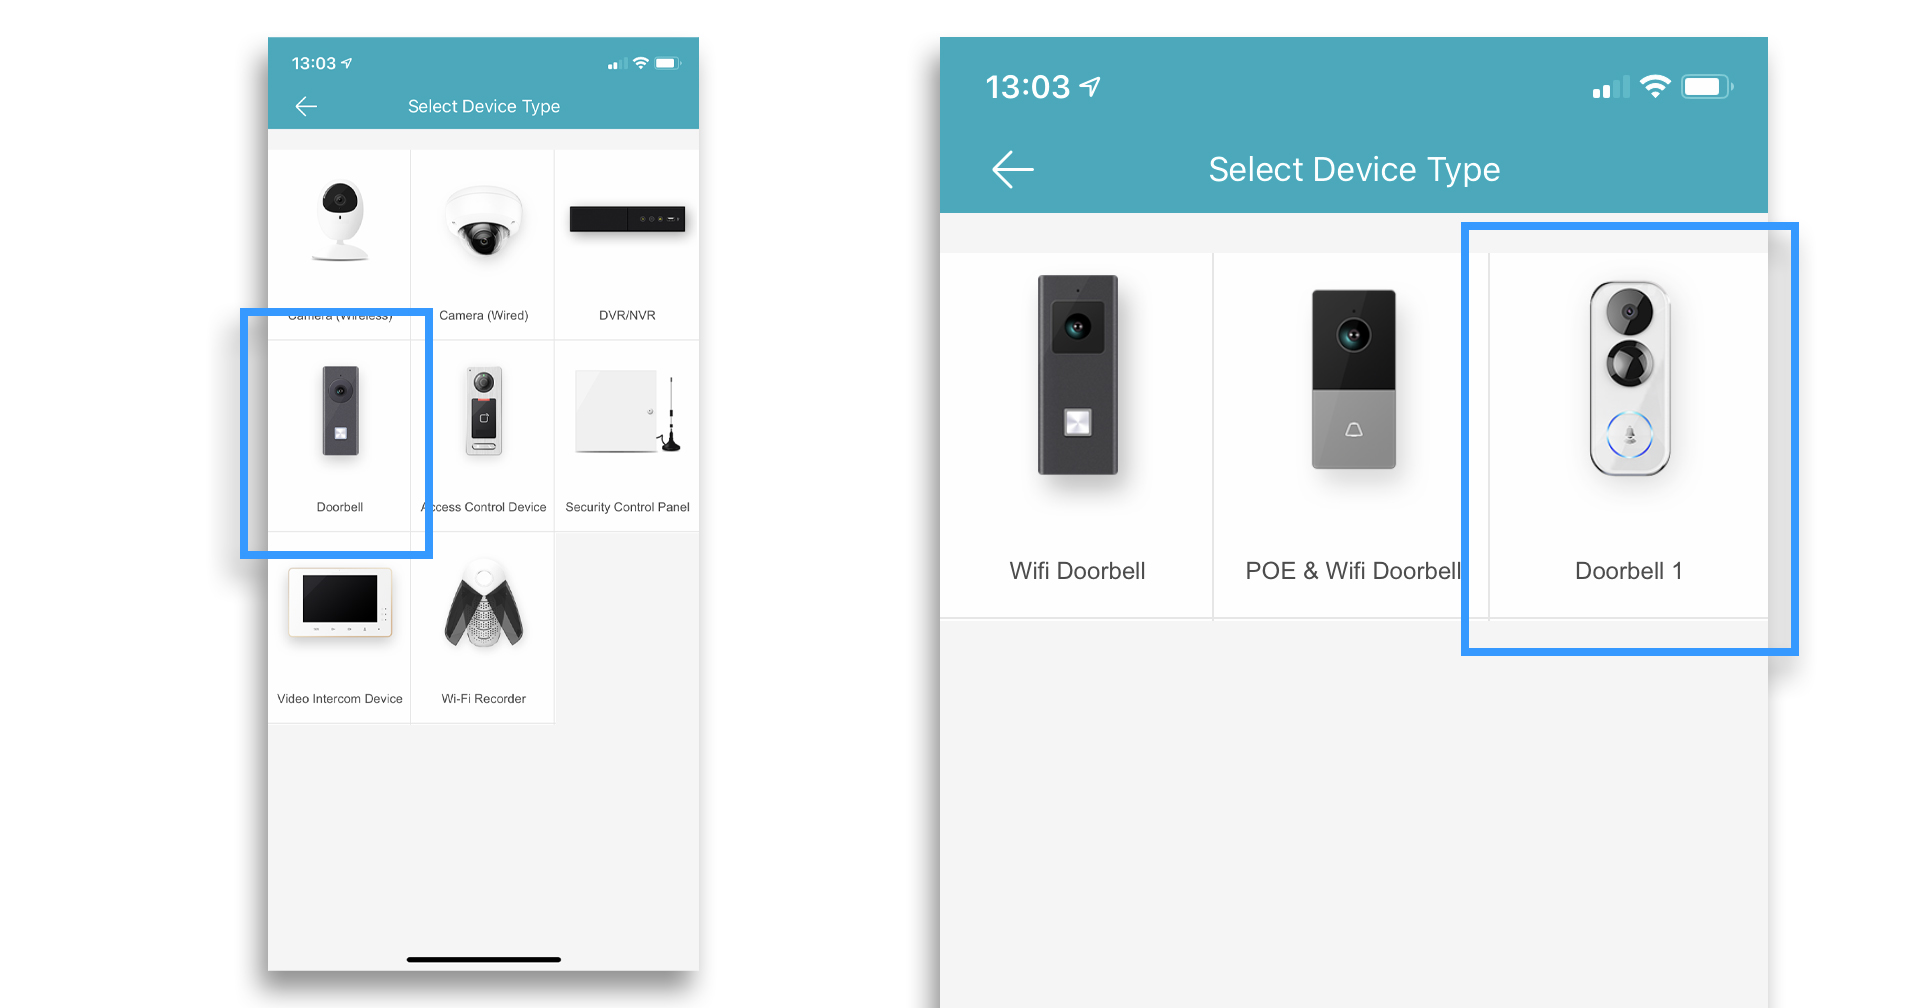
(Apple Devices Only) Select Your Doorbell Model
If you're using an Apple device to activate your doorbell, you'll have to tell the app which camera model you're setting up. Click the "Doorbell" group and then select the "Doorbell 1" option.
Connect Your Doorbell to the Network
At this point in the setup, the app just wants to confirm that your status light is flashing blue. This means the device's access point is turned on. We've already taken care of this, so go ahead and click "Next" to complete the setup process.
In order to connect your doorbell to the network, your phone will need to momentarily connect to your doorbell's access point. Click "OK" on the note that pops up and then ensure that your network credentials are correct. Click "Next" and then "Connect to a Network." Your phone's operating system will then prompt you to connect to your doorbell's Wi-Fi access point.
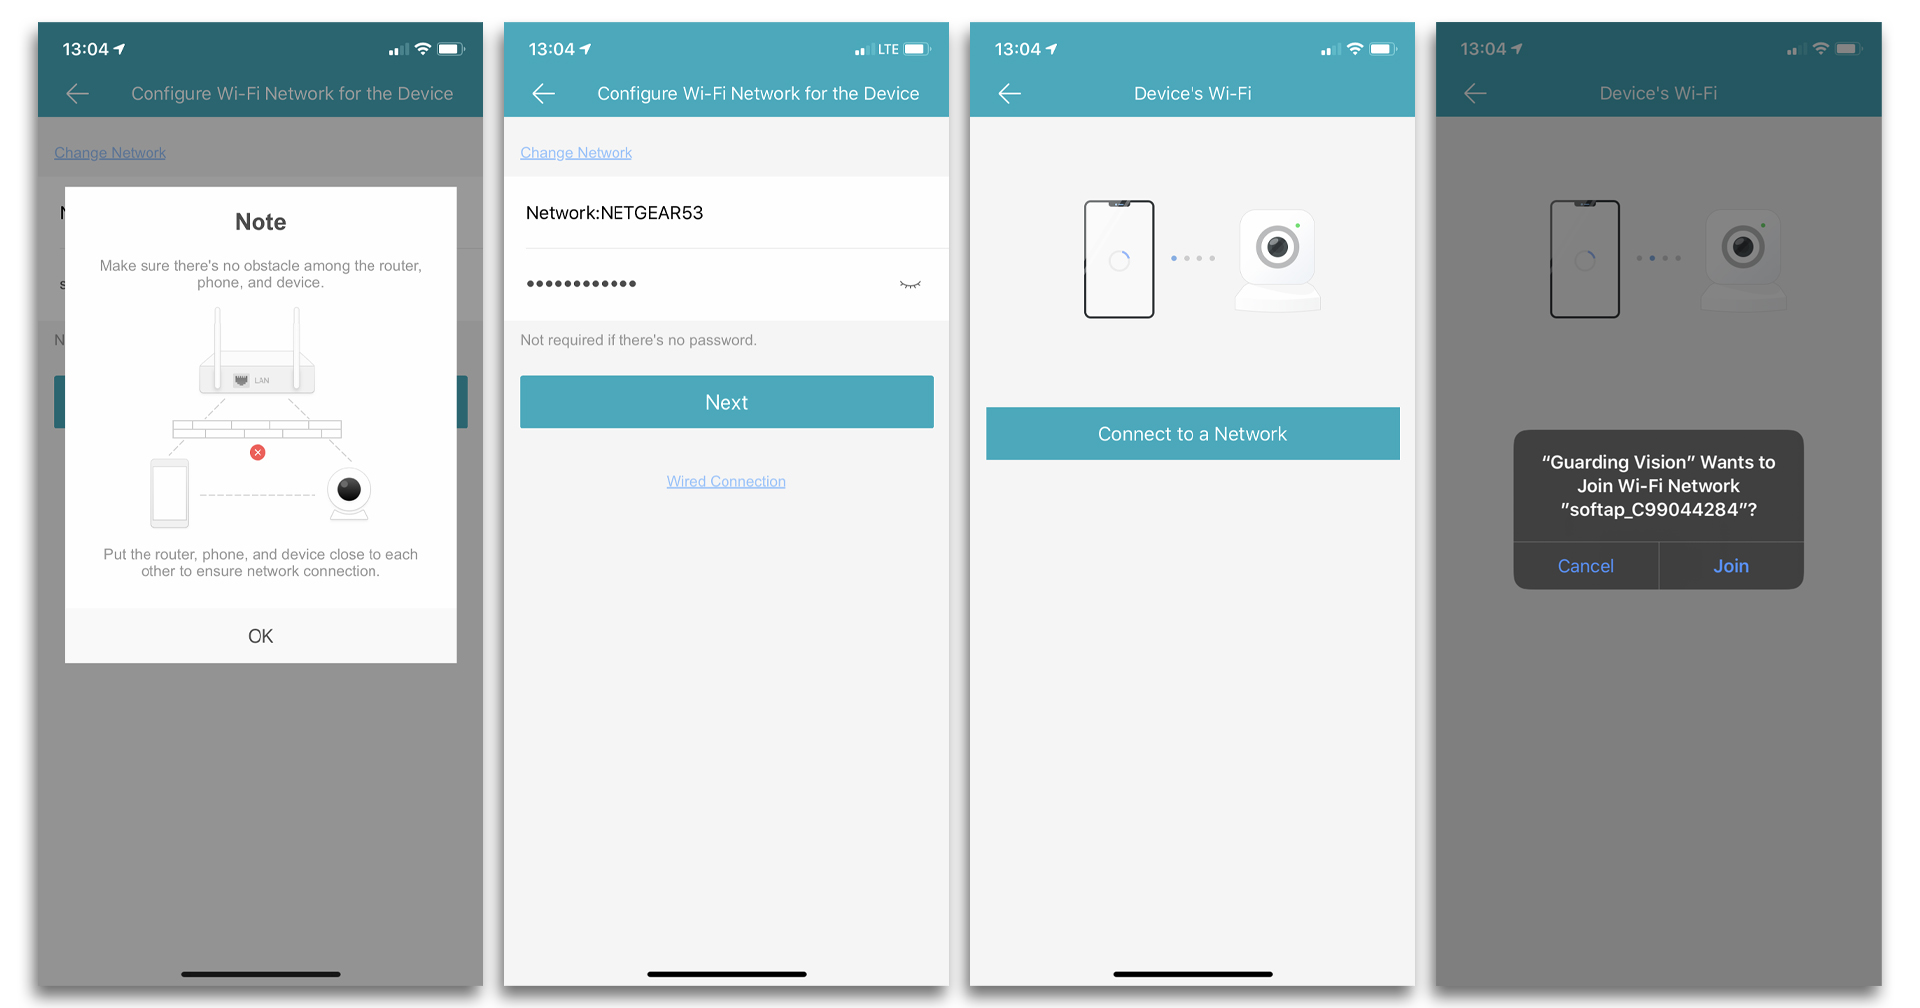
As your doorbell connects to the network, you'll hear the following audible messages:
Wi-Fi connected.
Platform registration successful.
Configuration complete.
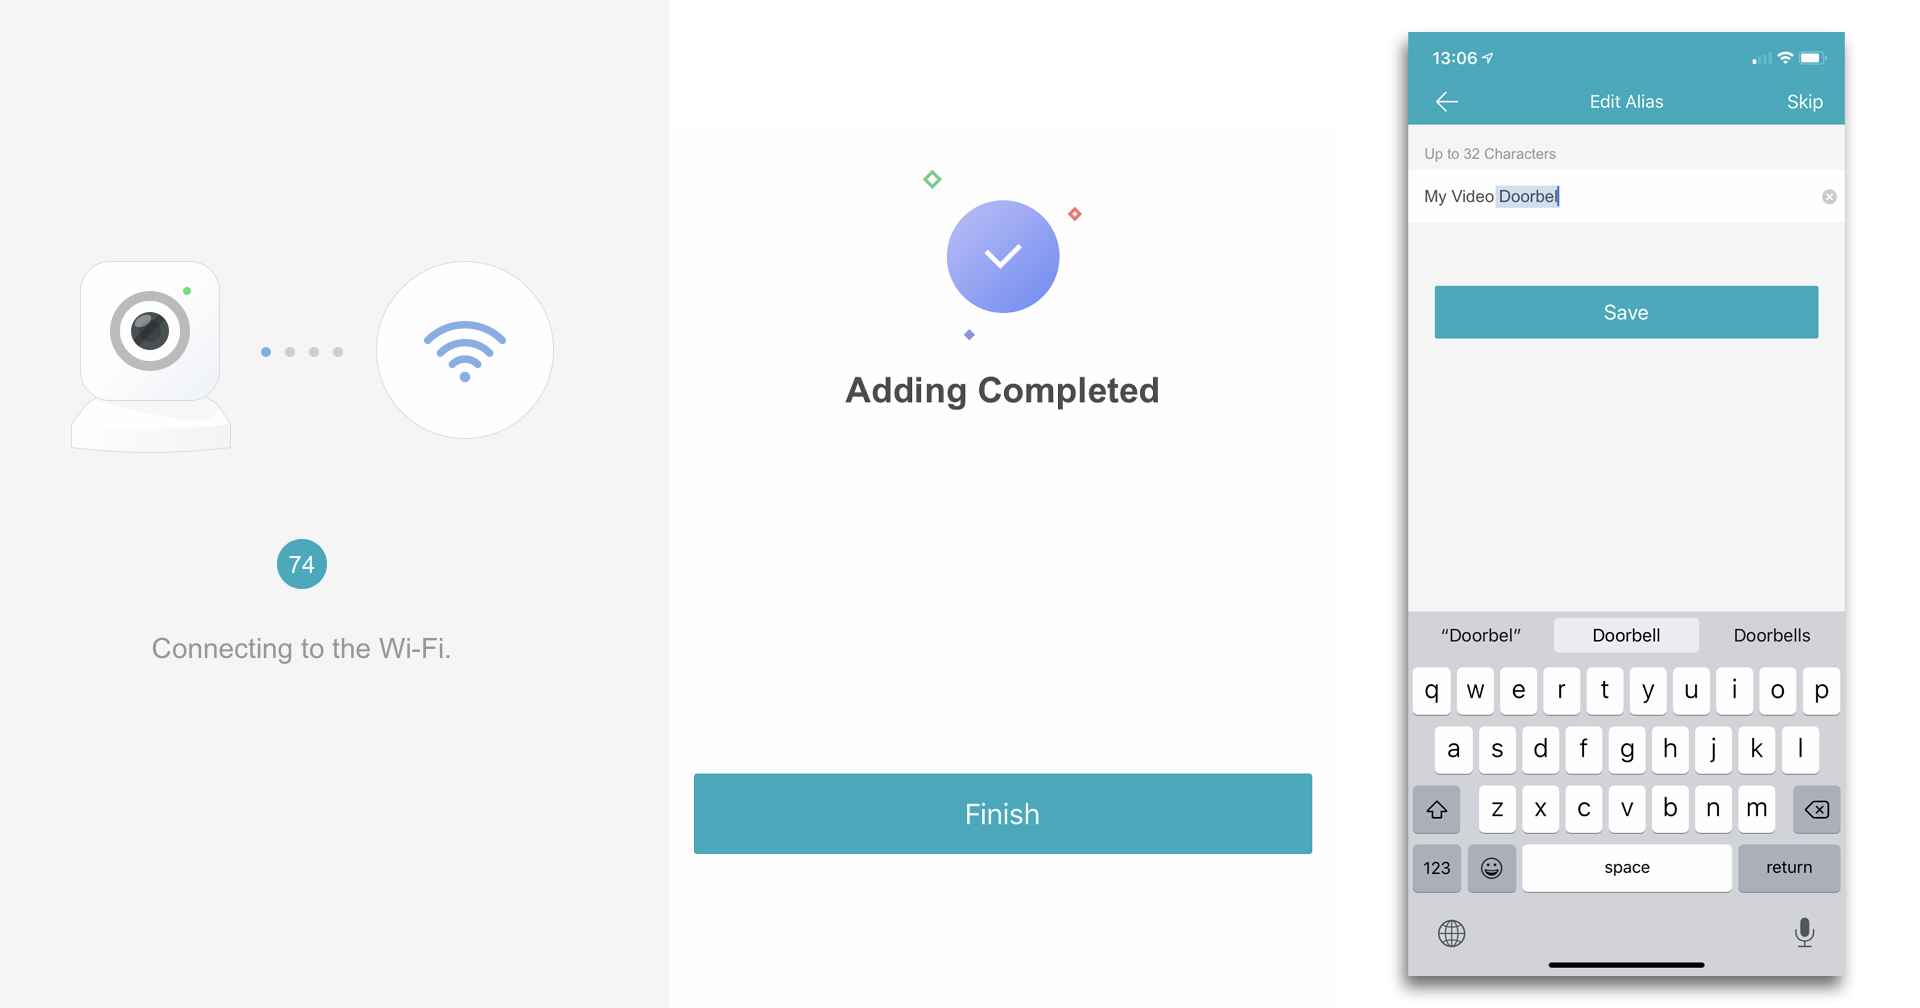
Click "Finish" to complete your doorbell's activation. Here you have the option to rename your doorbell to something more descriptive than the default model number.
(Optional) Setup Wizard
Once your doorbell is connected to the network, it is activated. The app will then walk you through a short setup wizard to configure some important settings. You can always click "Skip" in the top right-hand corner if you'd rather come back to these settings at a later point.
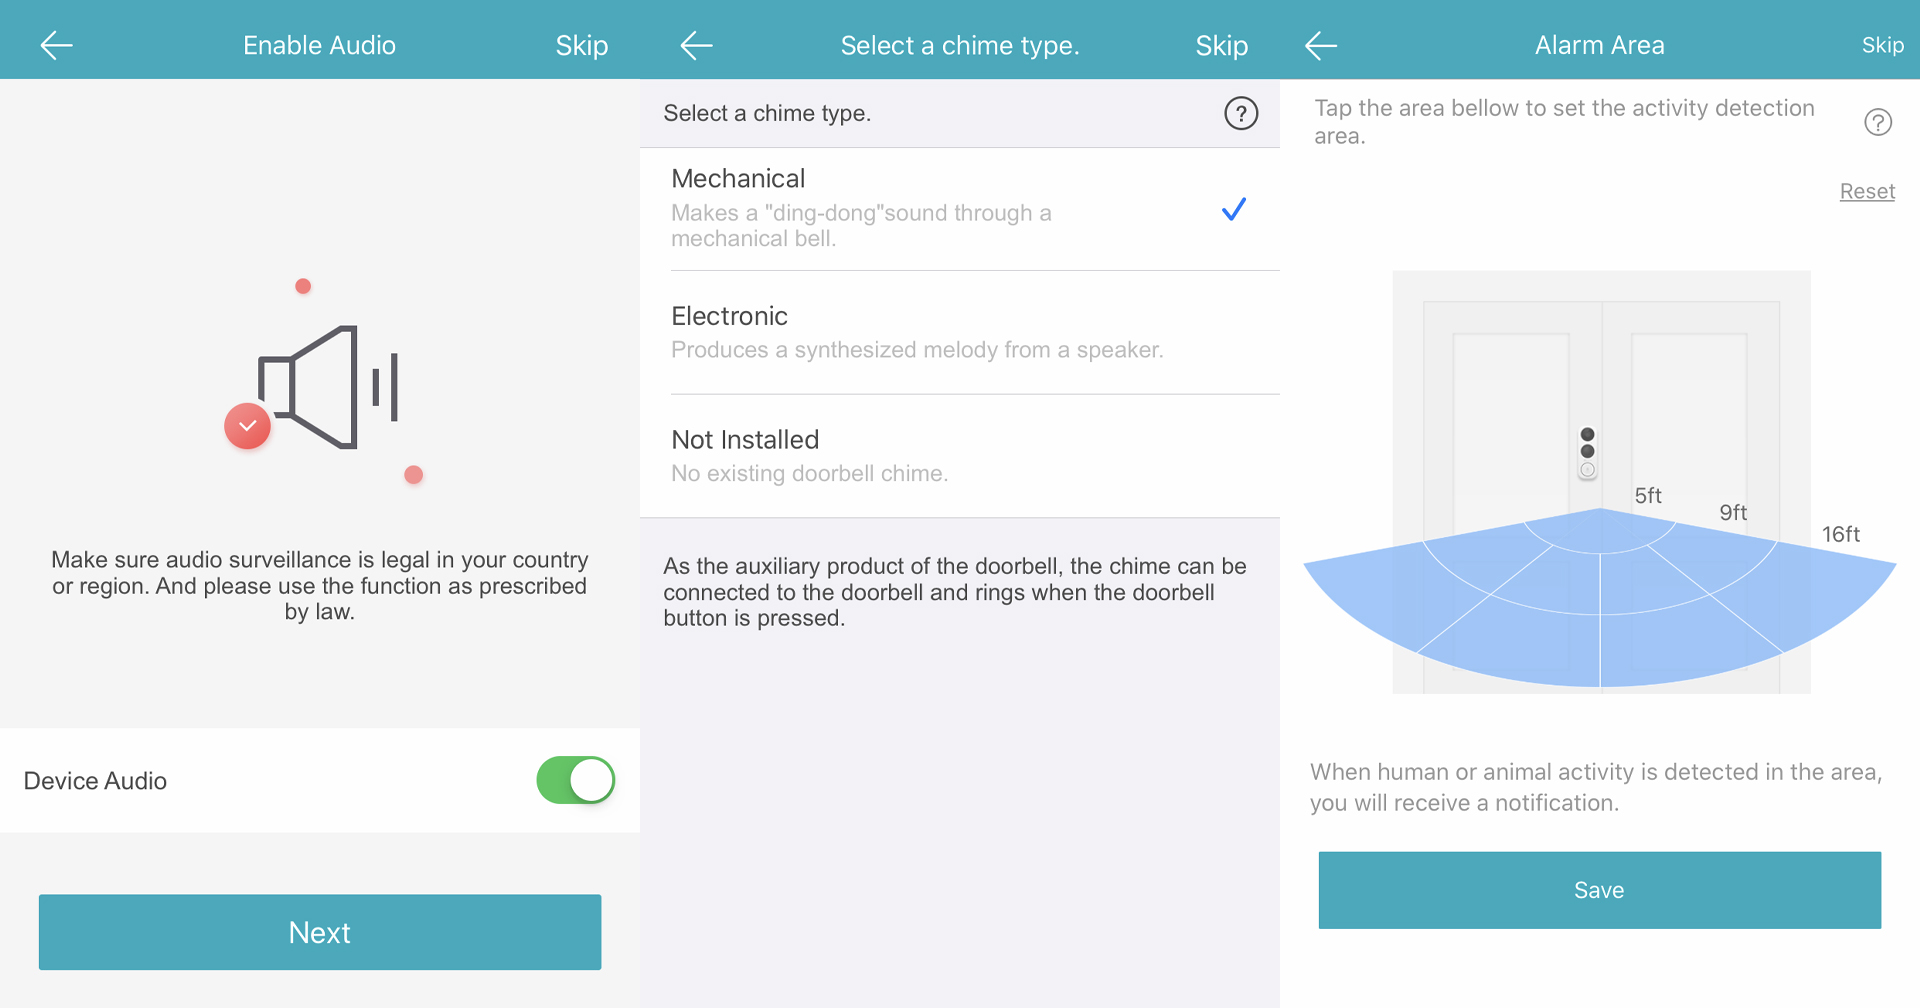
- Device Audio: The first option you have is to turn on the device audio. If you skip this screen, your doorbell's microphone will be muted until you change this in the settings.
- Chime Type: Here is where you will tell the app what kind of chime you're using with your doorbell. You have three choices: mechanical, electronic, or not installed. If you skip this screen, the doorbell will not work with your chime until you change this in the settings.
- Alarm Area: Here is where you can adjust your doorbell's PIR motion detection sensitivity. If you skip this section, the PIR alarm will be fully activated until you dial down the sensitivity in the settings.
Congrats! Your doorbell is now activated and connected to the network.
Related Articles
Live View CCTV Cameras On DMSS
Video Instructions Method 1: Live Video a single device Method 2: Live Video from multiple devices Step by Step Instructions Method 1: Live Video from a single Dahua device 1. Launch DMSS Mobile App. 2. Tap on Home. Then, you will see your device ...How to Download videos from DMSS App
This guide will show how to download recorded video in DMSS Mobile App. Video Instructions Step by Step Instructions Method 1: Video Clip 1. Tap on Home. Tap onPlayback. 2. Tap on the + icon. 3. Select your camera channel you wish to playback. 4. ...Set Up Push Notification on Dahua DMSS
Video Instructions Step by Step Instructions Enable notifications for alarm events 1. Launch DMSS Mobile App. 2. Tap on Home to access your added device list. 3. Select one of your added device that you wish to set up for notification. Tap on ... ...How to Playback Footage on DMSS
This guide will show how to play recorded video in DMSS Mobile App. Video Instructions Step by Step Instructions Method 1: From Live View. 1. Access your camera live view. 2. Tap on Playback icon. 3. Video playback will start playing for today's ...Create A Dahua Cloud Account
Video Instructions Step by Step Instructions 1. Launch your DMSS App, and select Me. 2. Select Log In Now. 3. Select Sign Up 4. Enter an email address and enter a password for the account. Check the User Service Agreement at the bottom of the screen. ...